Woocommerce uses a password field in the checkout form to create users. But sometimes we need to remove the password field from woocommerce checkout form. Let’s see how to remove password field from woocommerce checkout page.
By default, woocommerce password field looks like this picture.
We don’t need to use any hook or add any PHP functions to remove the field. All we have to do is navigate to Woocommerce > Settings > Accounts & Privacy.
On that page, simply check this field ‘When creating an account, automatically generate an account password’.
If you are still having trouble removing the field, please contact me.
Gravity forms is a great plugin when it comes to creating a form. It can create any kind of form like a simple contact form or complicated conditional form. Today I will show you how to display gravity forms entries in a template.
Here’s a simple form I just created with 4 fields.
We will create a table to show the data. Add this code in the template where you want to display the entries.
Now, all you have to do is replace the form id with your form id. Just change the id of $form_id variable and the $key[”] with your own form. The entries will be displayed like the picture. You can change the design as you like.
You can display all the data that is in the database by print_r the array by the following.
<pre><?php print_r($entry);?></pre>
Please post a comment if you find this helpful. And ask me if you still have any questions. You can also hire me to do your job.
PHP warnings and errors are different. When PHP errors crash or break the site the PHP warnings just display some annoying error reports. We can easily disable PHP warnings on the WordPress website.
Here is an example of a PHP warning. If you see something like this then I will show you how to hide the warnings.
Open the wp-config.php and find the line /* That's all, stop editing! Happy publishing. */
In this post, I will show you how to change or relocate coupon notices position in woocommerce checkout page.
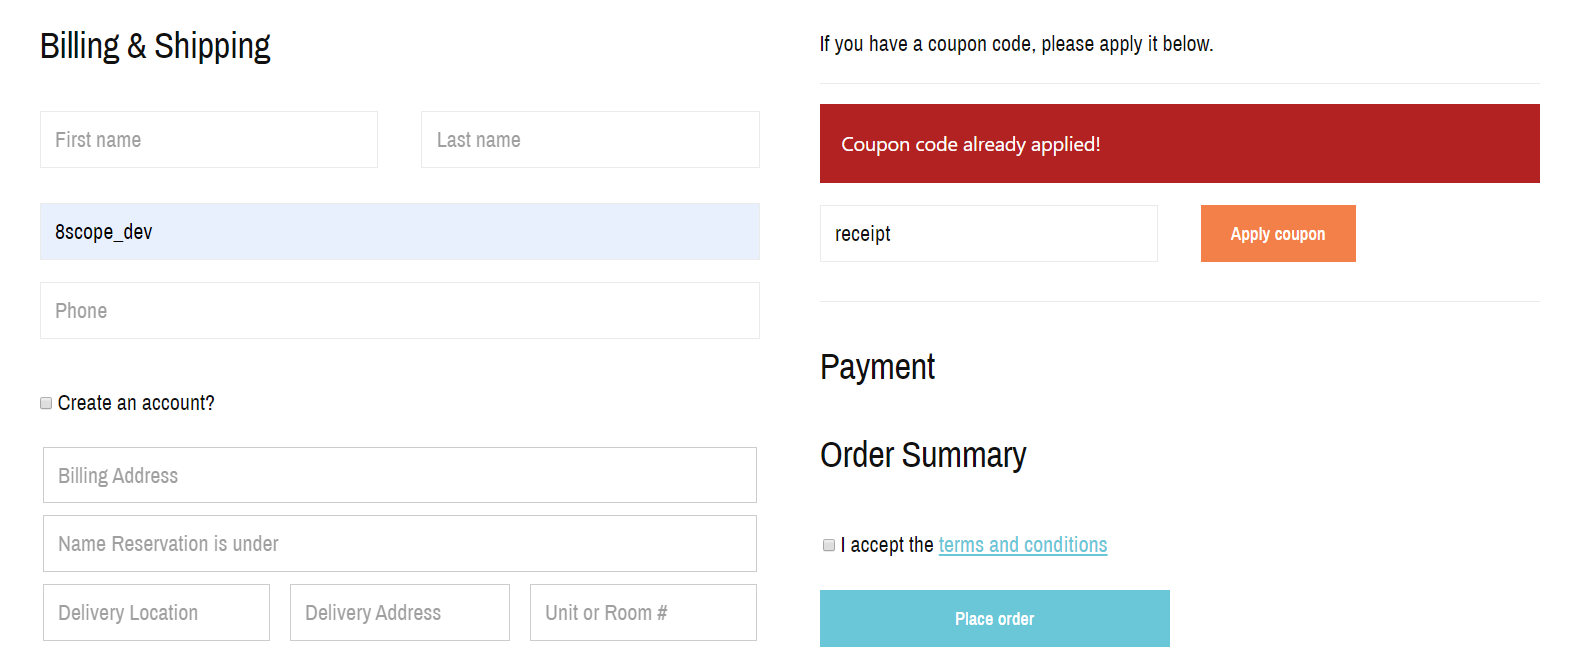
As you can see I have moved the coupon field from top to the right side of the checkout page. And the coupon notices are displaying at the top. But I want to display the coupon notices right above the coupon field. Let’s see how can we do that.
The notices are showing from the wocoommerce default ‘checkout.min.js’ file. As there is no hook to change the coupon notice position, we will have to edit the js file.
First of all, we will copy the checkout.js from the directory plugins/woocommerce/assets/js/frontend/checkout.js to our theme’s js/checkout.js folder.
Open the checkout.js from our theme that we just added and find line no. 618 where it says
$form.before( code );
Replace it with
$('p.coupon-text').after( code );
It will look like the picture.
In the last step, we will dequeue the default js file and enqueue our edited js file.
In this post, you will learn how to update the PHP version from iPage hosting. Changing the PHP version from iPage is very easy. All you have to is log in to iPage control panel and click on HOSTINGfrom Header.
Once you are on the Hosting page, you will see all the hosting information. Click on Scripting Configfrom the left sidebar.
Now you can see all the scripting configurations. Click on Manage PHP Scripting from PHP Scripting.
In this article, I am going to show you how you can easily remove invalid menu items from the WordPress website.
If we remove any page from WordPress website it goes to the trash. And if that page was added in the navigation menu they still display as invalid menu items in the backend menu page. That is not a problem as long as the removed pages aren’t showing in the frontend.
The problem is when we want to remove the invalid menu items from the selected menu. There is no option to remove all the invalid menu items easily. You have to remove every single menu item one by one and that is so time consuming and boring.
So, I created a simple plugin to remove the invalid menu items in one click. The plugin is called Remove invalid menu items. All you have to do is install and activate the plugin then go to the navigation menu page. In the menu edit page, you will find a button called ‘Delete invalid menu items’ beside the Save menu button. Just click on the button and all the invalid menu items will be removed.
If you notice fopen no such file or directory error after migrating WordPress site, then you can try these solutions.
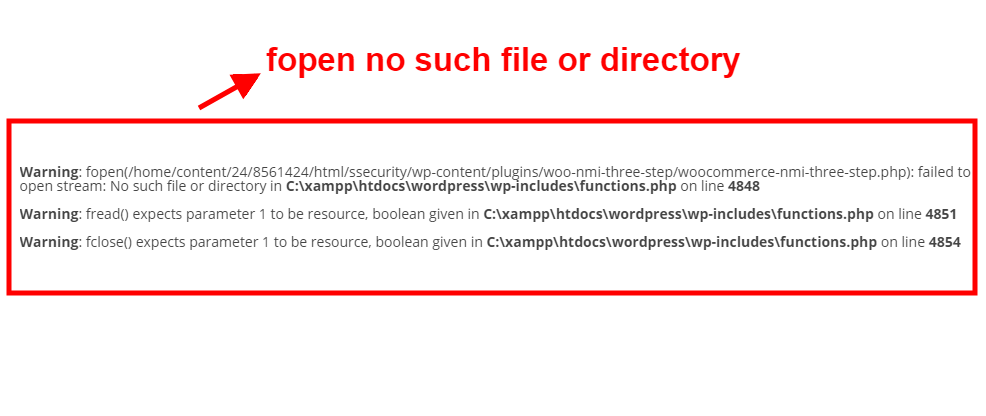
The error looks something like this:
Warning: fopen(/home/content/24/8561424/html/ssecurity/wp-content/plugins/woo-nmi-three-step/woocommerce-nmi-three-step.php): failed to open stream: No such file or directory in C:\xampp\htdocs\wordpress\wp-includes\functions.php on line 4848
Warning: fread() expects parameter 1 to be resource, boolean given in C:\xampp\htdocs\wordpress\wp-includes\functions.php on line 4851
Warning: fclose() expects parameter 1 to be resource, boolean given in C:\xampp\htdocs\wordpress\wp-includes\functions.php on line 4854
You can see that the page is trying to open a file that is not available. If you see carefully, you will notice that the directory is not exactly the current directory where your wordpress is installed. Actually, the directory link of your old server is still saved in the database. That’s why you are seeing the fopen no such file or directory error.
Now let’s solve this problem. I will show you 3 ways to fix the issue.
Solution 1: Deactivate/Reinstall the plugin to fix fopen no such file or directory error
Most of the time the error will be fixed if you just deactivate/reinstall the plugin that is causing the error. What it will actually do is refresh the directory path saved in the database with the current path.
Solution 2: Edit Database to fix fopen no such file or directory error
Go to PhpMyAdmin and select the database you are using. Please backup the database before changing anything. Find the fs_accounts from the option_name column in the ‘options’ table. Edit the ‘fs_accounts’ and you will see the old path is saved there. Just replace the path with the current directory path. Now the fopen no such file or directory error should be fixed.
Solution 3: Remove the ‘fs_accounts’
If the first two solution doesn’t work. You can try by removing the ‘fs_accounts’ row from the table. But in this case, you might have to add some of your saved settings will be lost. You will have to add them again.
Please asked me any questions if you have. And add a comment if it really helps you. Also, let me know if you have any better solution. And contactme if you still face the issue.
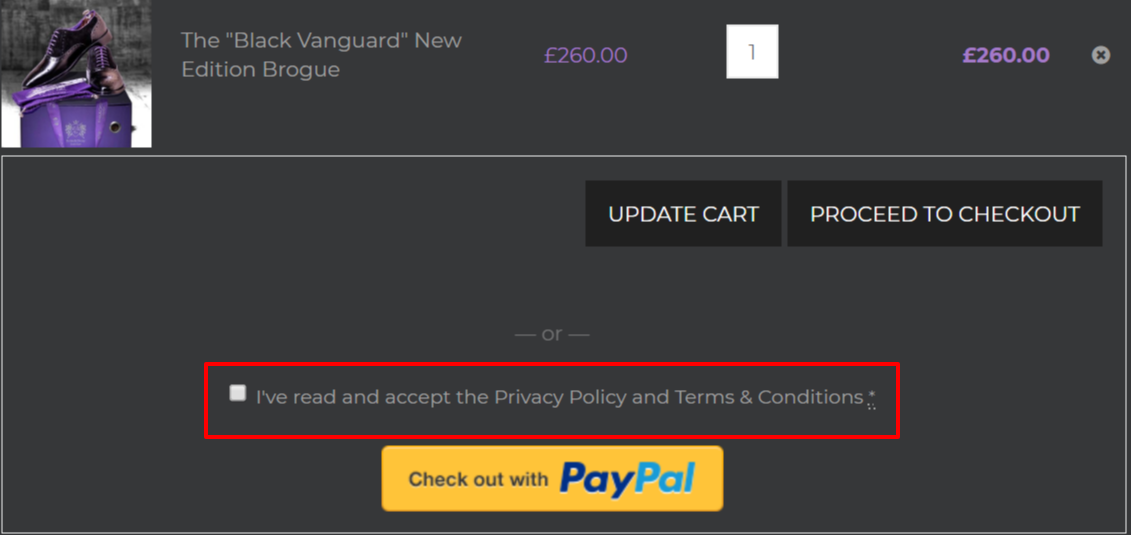
It’s been almost year I am working for a client who wants to add a checkbox before “Checkout with Paypal” button on Woocommerce cart page. Woocommerce normally adds a checkbox before the submit button on checkout page but not on the cart page.
When he asked me to add the checkbox I did a couple of google search and found that there is no option to add this from the plugin settings or any hook. So, I decided to add the checkbox by adding code. I am going to share what exactly I did to add the checkbox.
The idea was adding a checkbox before the button and disable the button until the checkbox is checked.
This is the code I added to in a js file.
jQuery(document).ready(function(){
jQuery('a#woo_pp_ec_button').before('<div class="paypal_checkbox_wrapper"><input type="checkbox" id="paypal_c_checkbox"/><label for="paypal_c_checkbox">I\'ve read and accept the <a href="/privacy-policy">Privacy Policy</a> and <a href="/terms-conditions/">Terms &amp; Conditions</a>&nbsp;<abbr class="required" title="required">*</abbr></label></div><p class="alert">Please accept the Terms and Conditions.</p>');
jQuery('a#woo_pp_ec_button').after('<div class="disable_overlay"></div>');
jQuery('#paypal_c_checkbox').click(function(){
jQuery('.disable_overlay').toggle();
});
jQuery('.disable_overlay').click(function(){
jQuery('.wcppec-checkout-buttons.woo_pp_cart_buttons_div .alert').show();
});
});
First of all, I added a checkbox and an error message before the button. Then I hide the error message with CSS so that it only display when the checkbox is not checked. Then I made a CSS overlay to disable the button until it is checked. And when the checkbox is clicked the overlay will be hidden so that the button is clickable.
I have also added this code to design the checkbox, overlay and error message.
You might have to change the CSS according to your theme design. This the easiest solution I have found and I hope it will help others. If you have any other idea please let me know so that I can try. Please comment if you have any question.